From the Manage Inventory window on the item details page, you can:
Step 1: Choose one of the following options:
- If you're updating your inventory SKUs, click the navigation menu and select Products > Inventory.
- If you're updating your catalog products, click the navigation menu and select Products > Products.
Step 2: A list of all your SKUs is displayed on the page. Click the SKU link to see the SKU's details.
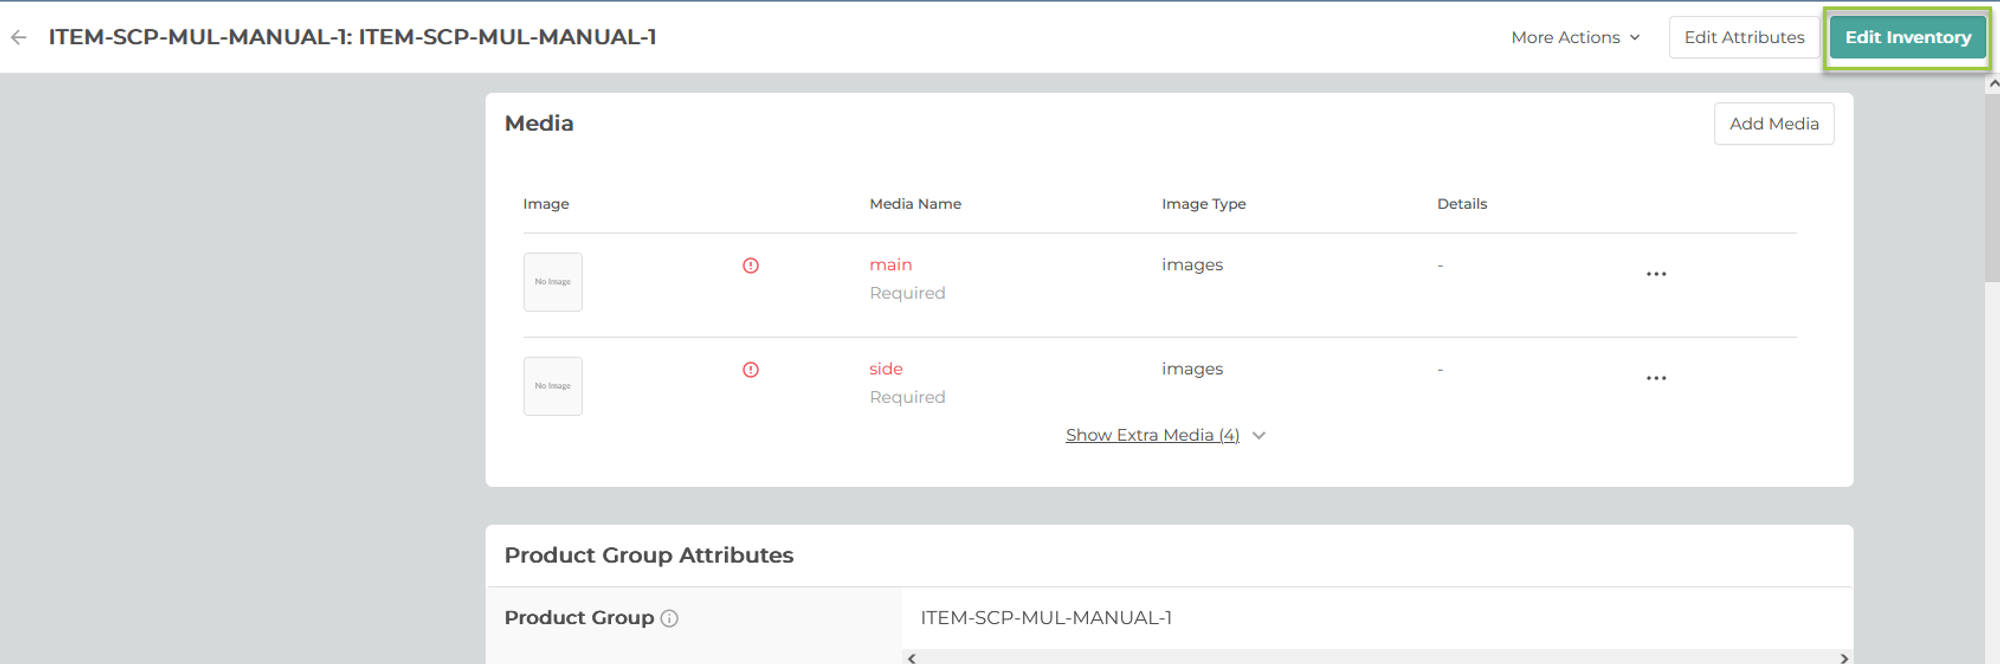
Step 3: At the top of the item details page, click Edit Inventory.
Step 4: In the Manage Inventory window, make sure the Warehouse Inventory tab is selected and choose any of the following options:
| Add inventory quantities | a. Click Add Inventory for the desired warehouse.
b. Choose any of the following options:
• Enter the available Quantity.
• Enter the Incoming Inventory and use the calendar to select an estimated availability date. |
| Update inventory quantities | Choose any of the following options:
• Adjust the available Quantity for the desired warehouse.
• Adjust the Incoming Inventory and use the calendar to select an estimated availability date for the desired warehouse. |
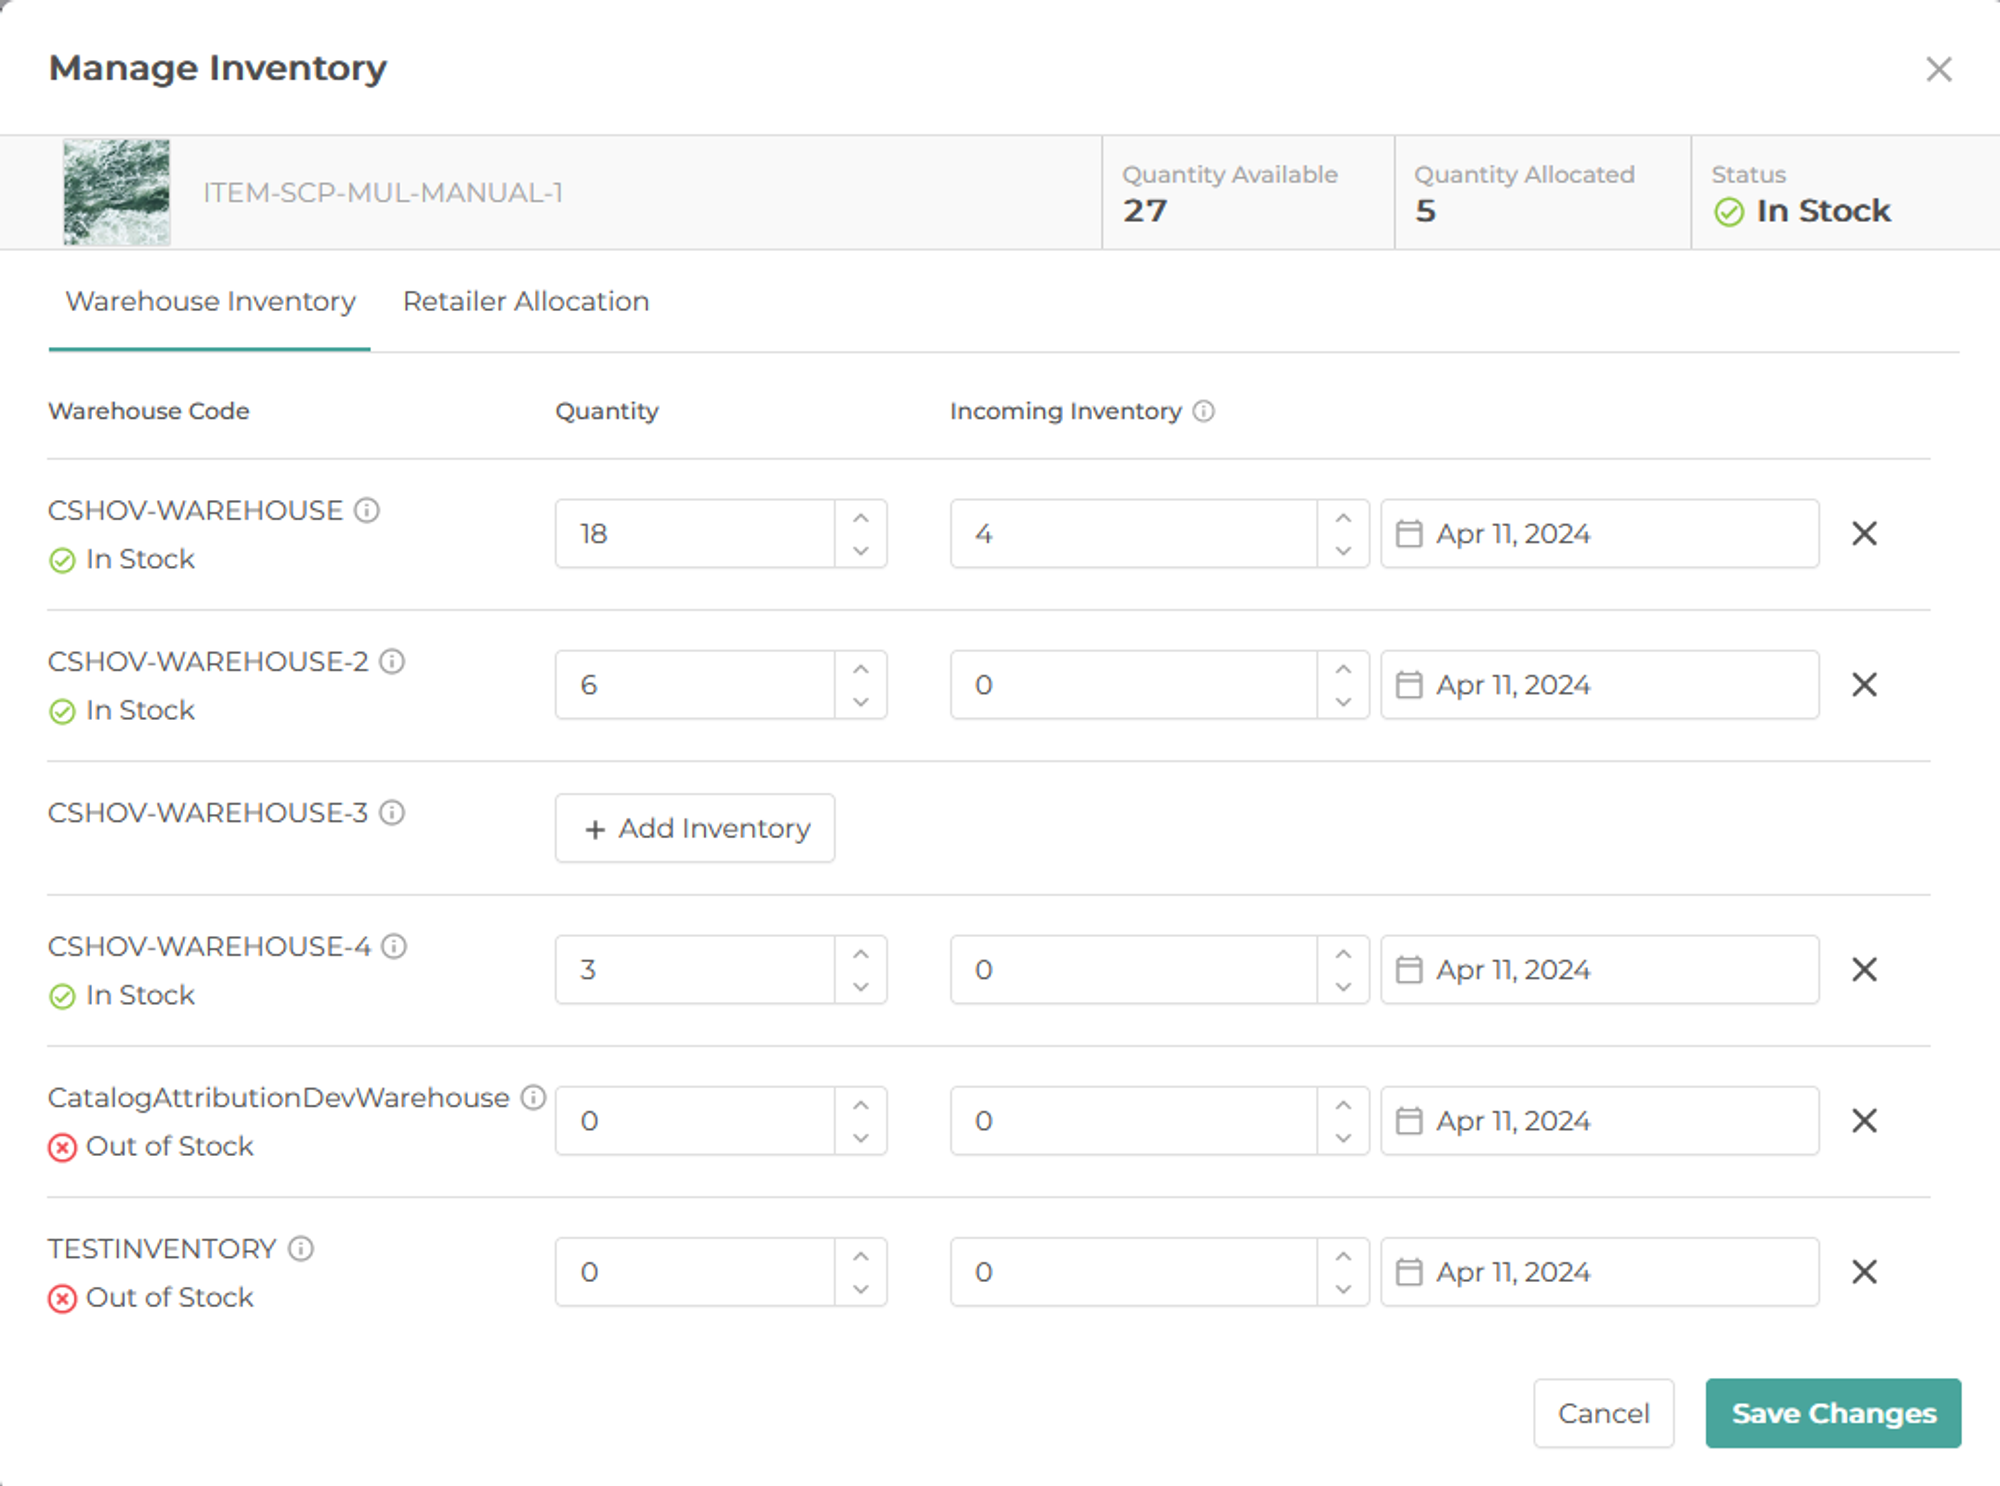
Step 5: When complete, click Save Changes.
A confirmation status message is displayed at the bottom of the page.
Step 1: Choose one of the following options:
- If you're updating your inventory SKUs, click the navigation menu and select Products > Inventory.
- If you're updating your catalog products, click the navigation menu and select Products > Products.
Step 2: A list of all your SKUs is displayed on the page. Click the SKU link to see the SKU's details.
Step 3: At the top of the item details page, click Edit Inventory.
Step 4: In the Manage Inventory window, click the X next to the desired warehouse to remove the quantities and warehouse for this retailer.
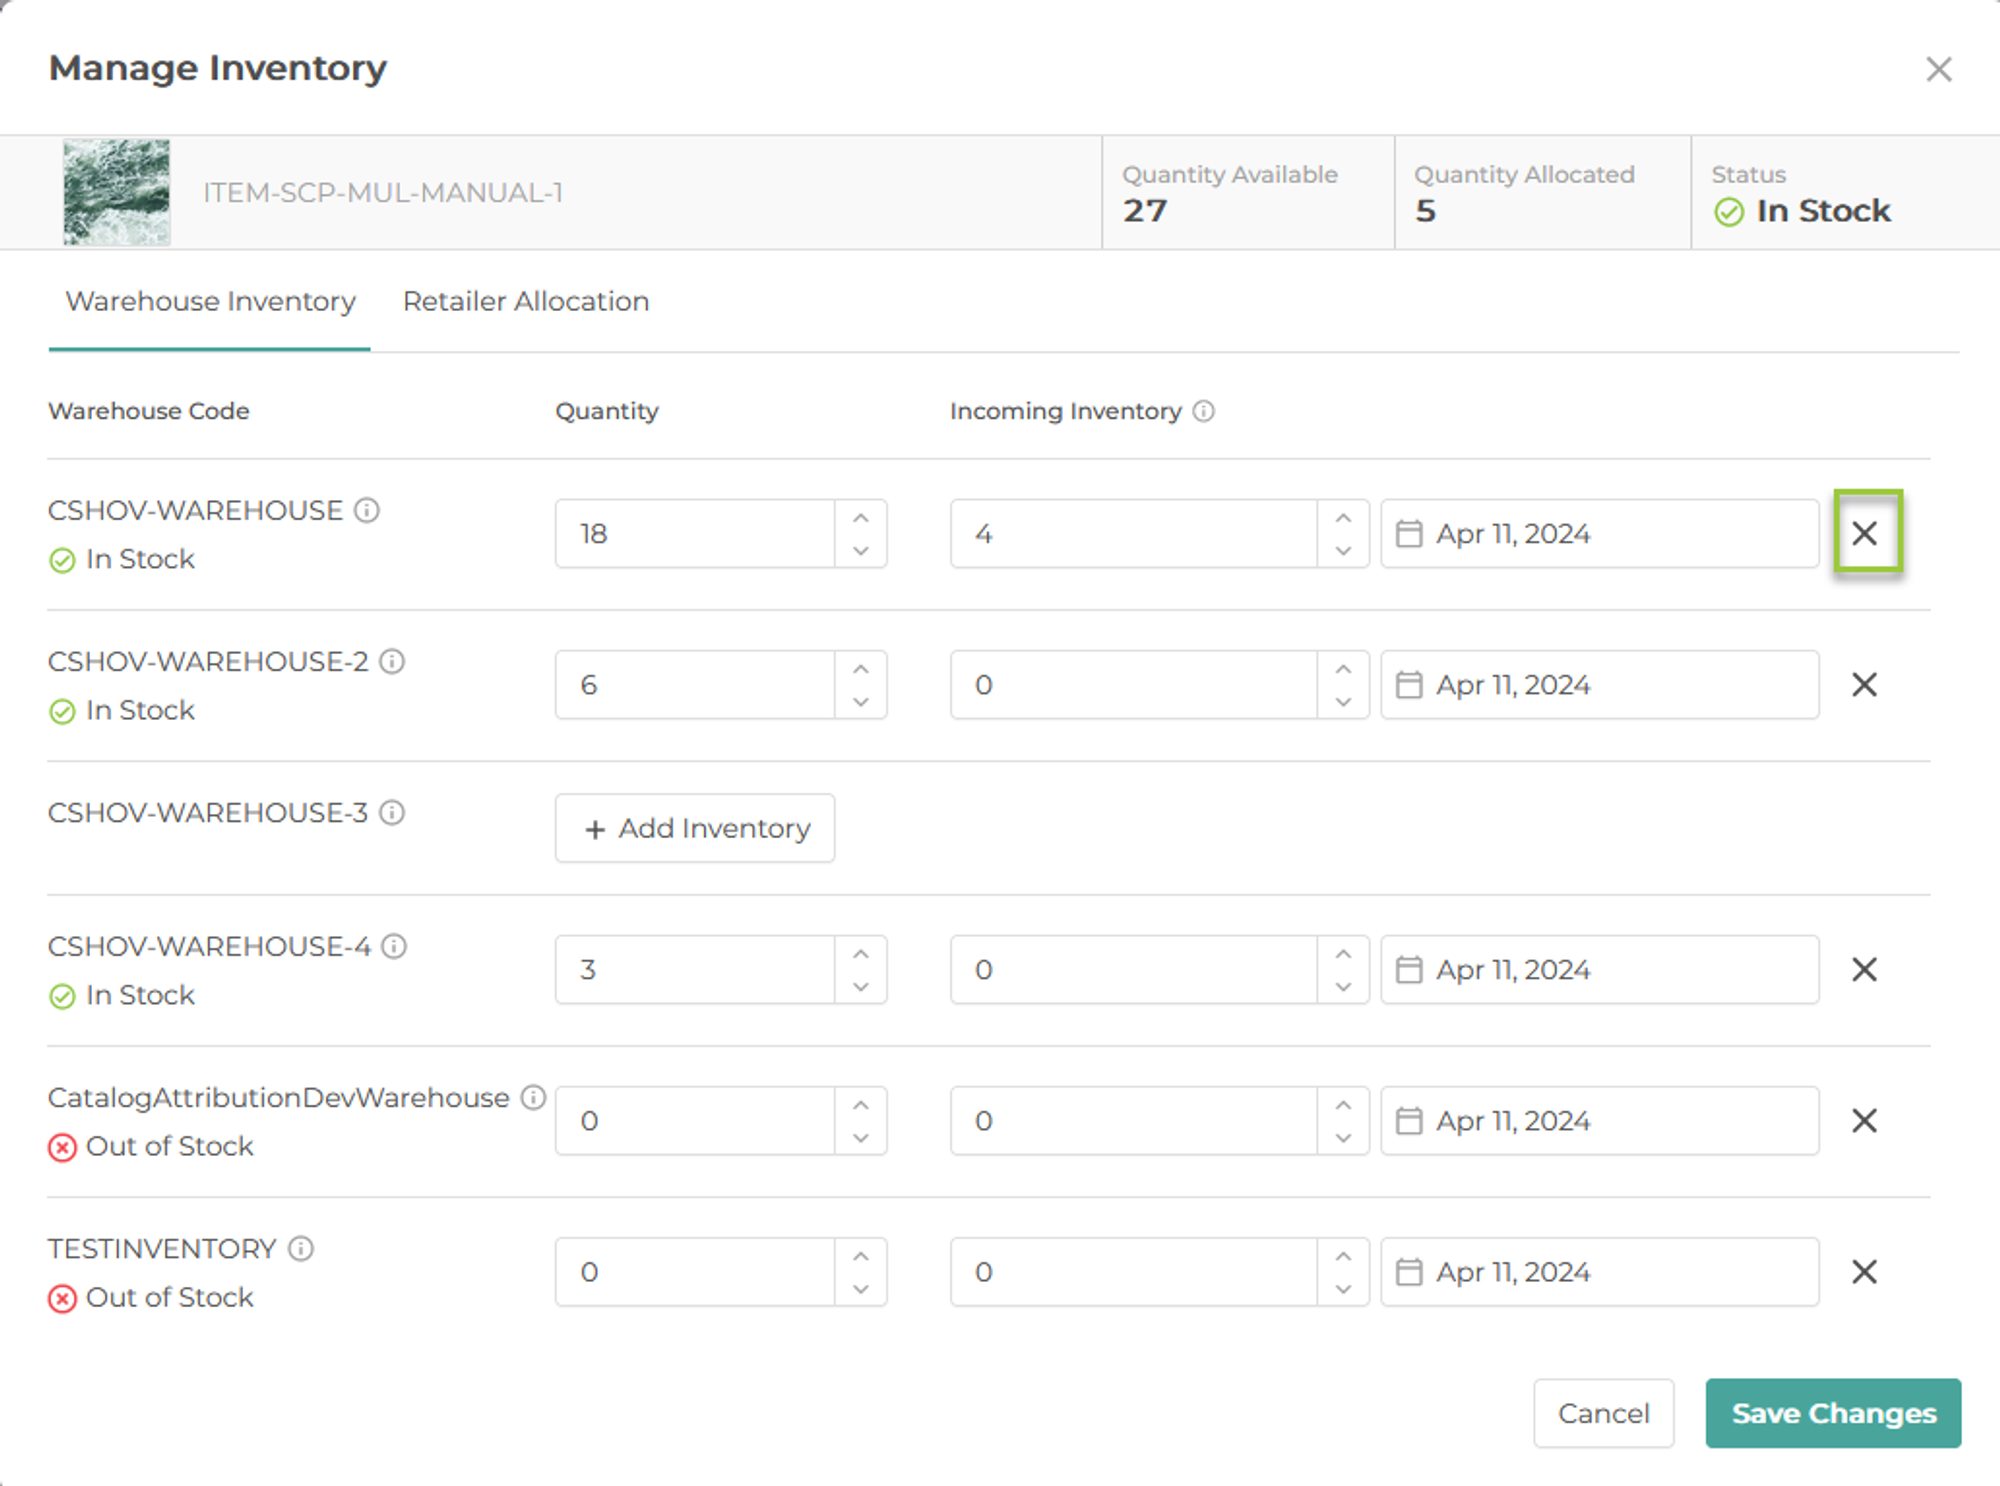
Step 5: In the confirmation window, click Remove.
A confirmation status message is displayed at the bottom of the page.
Step 6: When complete, click Save Changes.